Disclaimer: Exotic Pebbles and Glass has no expertise with regards to the build of a fire pit. We only have our own experience from which to share. The following is not expert advice.
There is nothing better than sitting by a sand fire pit on a chilly fall night. A fire pit is a great place to gather family and friends for a simple get-together. The social gathering can be twice as fun and rewarding if you build the space yourself. Even though all fire pits are welcoming, a sand fire pit steps up your backyard gatherings to the next level.
A sand fire pit looks much cleaner than a regular pit. It gives off a feeling of luxury and family and friends will love sitting by the fire. They may even ask how much it cost to hire someone to make it. Good news! A sand fire pit can easily be made without the help of a professional. There are eight steps to making your backyard an oasis.
While these steps are easy to follow they can be time-consuming. Read through the steps before starting the project to ensure there is enough time to complete every step. If there are a few willing friends or family members be sure to ask them to help. This can greatly cut down on the time needed to complete the project. Not to mention reduce the heavy lifting for a single person.
Step 1 – Find and Plan the Space

Dusk
The best time to plan a fire pit is when it would be used. Many people choose to have a fire towards the end of the day. It is easy to get the fire prepared in the daylight right before dusk and then enjoy the fire through the night. Take a quick stroll around the yard at dusk to find the perfect spot for the fire pit.
Area
There needs to be plenty of room to make a sand fire pit work. At least sixteen feet and up to twenty feet depending on the size of the pit and the number of chairs desired. The area should be far away from anything that could catch on fire. Think about bushes, any branches that are hanging, and even equipment like a swing set. Try to keep these items as far away as possible to avoid any mishaps.
Make sure the fire pit is accessible for a hose. If the fire ever got out of control it is best to be able to quickly get to a water source to put it out. Plus it is just easier to put out at the end of the night when everyone is tired and would like to go home. Another thought is storage. Where will the chairs be put? Will they stay outside or go into a shed? Think about where the firewood can be stacked to be close to the fire pit.
Step 2 – Gathering Supplies
The most important items to purchase is a wheelbarrow. There is a lot of gravel, stone, and sand to move around. Moving that by hand is a sure way to be sore the next day. The easiest way to get gravel is to make sure the driveway is clear. This is an ideal space for the company to put the gravel so it can be transported to where the fire pit will be.
Using crush and run gray stone that is 3/8” is best. Depending on preference this should cover anywhere between two to four inches. Getting a full load will ensure there is enough gravel for the whole project. This is about eighteen tons of gravel which can cover 500 square feet of space.
For the fire ring, two different sizes of stone will be needed. Any landscaping store will have landscaping stones that work perfectly for fire pits. Purchase large stones that vary from sixteen inches to twenty inches. Smaller stones are also needed that are eight inches to twelve inches. The larger stones will be used for the fire ring while the smaller stones are on the perimeter.
Depending on how large the fire pit is will determine how many stones are needed. These stones can take up a lot of space and are very heavy. Ask the landscaping/home improvement store to deliver them to your house, most will do so free of charge. With this large of a quantity of stone being delivered, they will come packaged in pallets.
Mortar cement and sand will be needed as well. This can be found at any hardware or home improvement store. There is a choice between different sand colors, depending on what the fire pit will look like. For a more beach-like fire pit choose silica sand. This is the light, white sand that many people expect by the ocean. A cheaper alternative is playground sand which is a much more common light brown color.
There are a few simple tools needed to complete the project. They are ones that can usually be found in a garage at any given time. Find a shovel, screwdriver or wooden stake, access to water, a ten-foot nylon string, and hard tine rakes. If these tools are not handy they can be picked up at any hardware store. Make a list before leaving home so all materials can be collected in one trip.
Step 3 – Gravel
Start by making the center of the fire ring. Do this by driving a stake into the middle of where the fire ring should be. Tie a nylon string to this stake. Measure the diameter of the ring and mark this on the string. Use the string to walk around the diameter of where the pit will be to indicate where the edge will be. Once the outside of the pit is marked dump all of the gravel inside of this circle to start the pit.
Using a rake even out the gravel. Use enough gravel to ensure there is at least two to four inches inside of the ring. This is going to be the base of the fire pit and should be leveled. This may take some time, but it will be worth it in the end when there is a nice even walking surface. Unless taking a lot of breaks is part of the plan, gathering a few friends to help is needed. This is a lot of heavy lifting and raking and it is very tiring.
Step 4 – Fire Ring
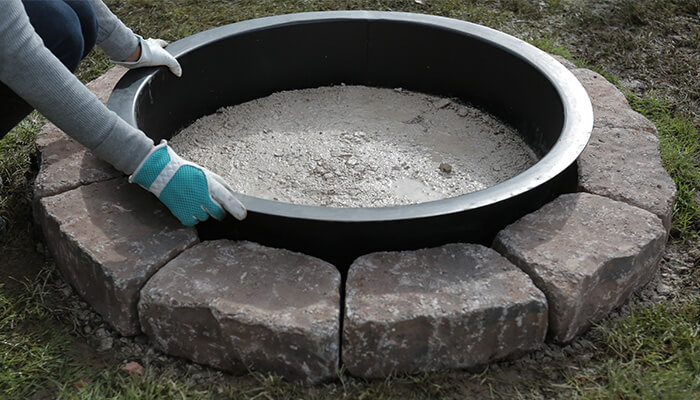
Using the string and stake measure out the diameter of the fire pit. Creating a small trench around the diameter of the fire pit will help mark where the stones will be placed. This is the fun part, putting together the pit.
Take the cement mortar and sand and mix up a batch. The instructions for this should be printed on the bag. Use just enough to fill the bottom of the trench with the mortar. As the bottom is filled place the largest stones around the trench. Repeat this pattern and always check to make sure the stones are going to the correct place by pulling the string out to mark the diameter of the pit. Use the smaller stones to fill in any gaps that the large stones create.
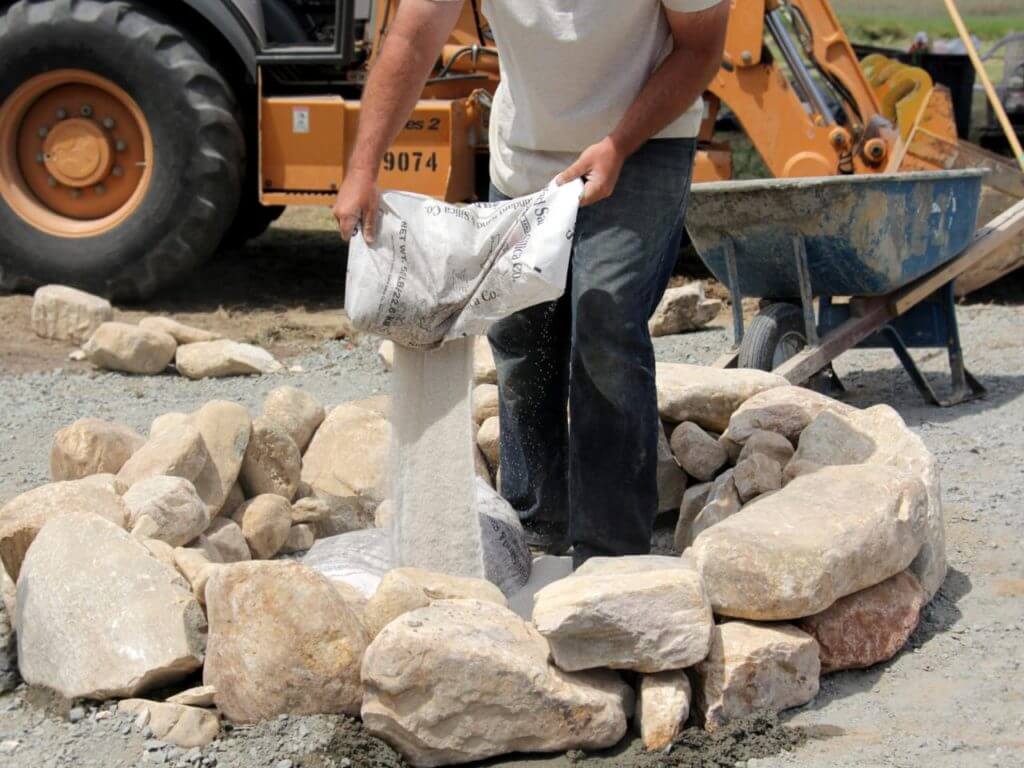
Step 5 – Laying Sand in the Fire Ring
With whatever kind of sand was chosen and fill the inside of the fire ring. There should be a layer of sand four inches deep on the inner portion of the fire ring. Try not to bump into the stones. They are attempting to set with the cement mix. Any movement can stop this process.
Step 6 – Outer Perimeter Stone Ring
The outer perimeter of the sandpit needs to be trenched. Once the entire outer ring is trenched it will be filled with the smaller stones to create an exact barrier for the sand on the inside. Use the mortar to set this smaller stones.
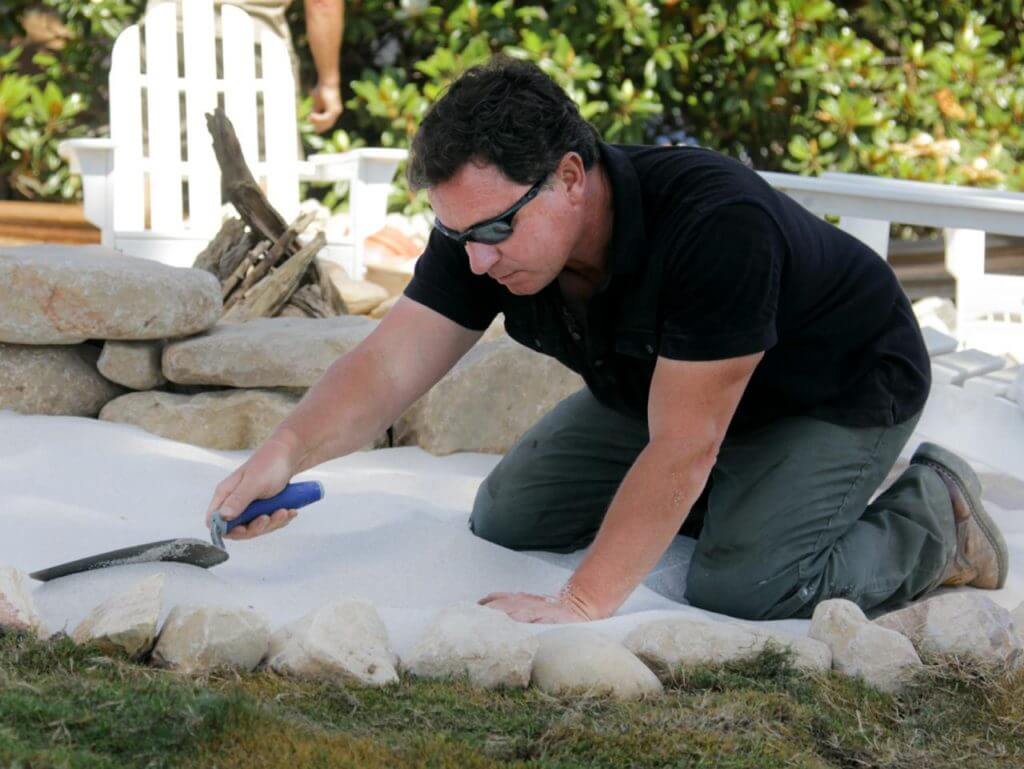
Step 7 – Sand
It is time to put in the sand that will fill the area from the outside of the fire pit until it reaches the outer stone perimeter. This sand should be about four inches deep once it is fully poured. Using a rake can help spread the sand quickly. To get the hard to reach areas use a hand trowel. This will help the sand reach the small crevices created by the rocks. Be careful not to knock into any rocks that are still setting.
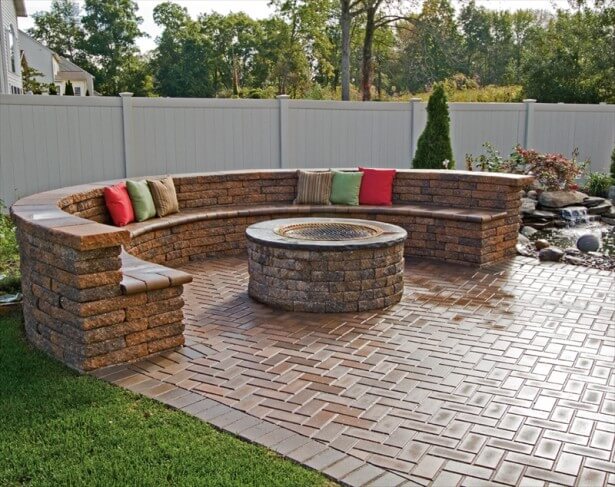
Step 8 – Mulch
Putting mulch around the outer stone perimeter will help to cover any blemishes or extra materials that have spilled out during the creation process. It also helps to create a contrast of color depending on the color choices. A white sand and a dark mulch can help the landscaping stick out a little more. Add in some chairs for a complete fire pit look.
Sand Fire Pit Design Tips
If looking for a sophisticated and clean look for the fire pit consider adding some decorative pebbles to the mix. These decorative pebbles come in all shapes, sizes, and colors so it can be easy to add a little bit of flare to a project like this. One source to purchase this type of fire glass is from Exotic Pebbles & Glass.
This company has pebbles in three different sizes. There are small pebbles that are one-half to one inch, medium that are one inch to two inches, and large that are two inches to three inches in size. Depending on the look that is achieved different sizes may be needed. Mixing sizes together can create a more dynamic look but it can make for a less even surface.
Exotic Pebbles & Glass uses decorative pebbles that are natural. They come in either a polished version that has been smooth and shinned to have a more finished look. For projects that are a bit more rustic and natural, there is a “natural collection”. These rocks are not smoothed and look like they were just plucked from the ground.
These pebbles have a nice variety of color to them. Many of them have multiple shades of colors like browns, golds, grays, and yellows. These many colors will look great beside the natural look of the larger rocks used for the fire pit. For a real wow-factor use the Snow White Pebbles or the High Polished Black Pebbles. Both of these have very distinct colors that will really pop.
These pebbles are great to use beside any walkway leading to a fire pit. If there is a sidewalk or a more natural rock walkway use these pebbles to lead the way. Simple outline the walkway with some brick or sidewalk edging. Then fill in the area with any variety of pebble. There are some great landscaping ideas here in this post if you want more inspiration.
Another idea is to use them on the outer perimeter. They can be a great alternative to using the smaller stones. Use a sidewalk edger or other stone to line the edge. Then add in these pebbles all around the fire pit. A fine white sand outlined with the High Polished Black Pebbles will look stunning.
No matter what color choices or design choices are made this new fire pit will be a great addition to the home. This project does not have to cost a lot or be done by a professional. It is easy to do and even easier to relax around once it is finished. The best way to get this project done quickly is to invite over a few friends with promises of a nice fire to sit around once it is complete.
A regular fire pit is fine. It gets the job done and there are always great times spent on cold nights around a fire. The sand fire pit is the whole package. This project helps elevate the lawn to a sophisticated level. The beauty the project brings will make neighbors envious.
Once completed it is going to be a spot that is frequented by friends and family. Many get-togethers will take place around this fire pit. Memories and photos will be captured here. Make sure they are on a beautiful backdrop like a completed sand fire pit.

